CLICK HERE FOR FREE BLOGGER TEMPLATES, LINK BUTTONS AND MORE! »

Monday, February 28, 2011

Shopping List


A while back I saw a post where someone made there own shopping list, of course I had to make one! I finally found some time, during what is going on a 3 hour nap time! By the way, you will have to excuse my lack of post, it has been crazy around here! I have been selling items in my etsy shop which has kept me busy and I came up with a design for an all-in-one diaper changer that I will share with you soon, but they will be for sale in my etsy shop right over there ---------------> in a few days!

Now back to the shopping list! I have seen 2 different tutorials on how to make these, so this is not the only way to make them. I chose to use stuff that I already have here and that was quite so that I didn't interrupt nap time!


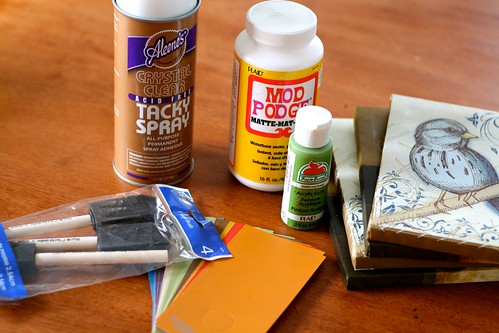
Here is what you need:
Glue gun
Heavy cardstock or cardboard cut at 4.25 x 12 inches
Scrapbook paper cut at 4.25 x 12 inches
Coordinating paper cut at 4.25 x 11 inches
Ribbon
Glue stick
Cutting board of some sorts
10 copies of this printable shopping list from here (I did not make this list)
*Note: You can print 26 and have one for each week of the year. I grocery shop once a month and do not need 52 list!

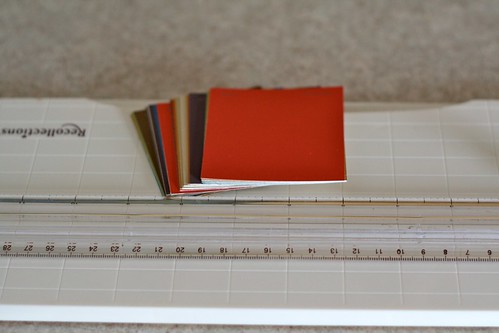
First up, cut your shopping list in half, so at 4.25"
Next, make all of your other cuts as noted above. Also, score your heavy cardstock and scrapbook paper at 1" and 7/8".
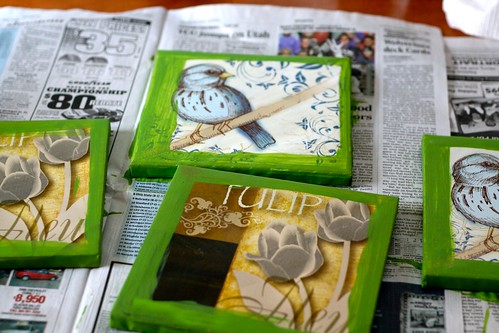
Glue all your pieces down. As you can see, the coordinating paper is for underneath the shopping list and the main scrapbook paper is for the back of the list to be folded over.
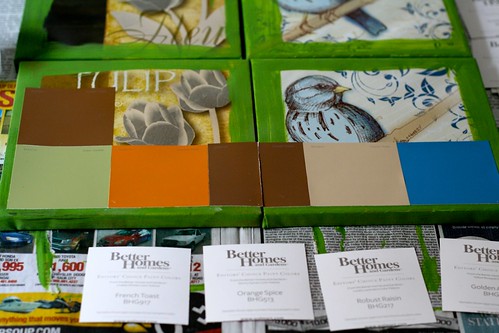
Line all of your shopping list papers up on the heavy cardstock, nice and neat.
Use your glue gun to put glue where the top of the list will be and also on the top sheet of paper.

Fold it over, be careful not to burn yourself.
Now, use some glue, very neatly, and put it on the sides of the paper but do not go past the bottom of the heavy cardstock. Hold it until the glue dries. If it looks crappy, like the picture below, you can run your finger over it to smooth it out, but do this with caution as it can burn you.

I didn't like the way the top looked, so I added some coordinating ribbon. I glued it where just a tiny bit would hang over the lip so that the paper could still be torn off easily.

You can now leave it as is or add a magnetic strip or in my case a 3M picture hanger! Since I have stainless appliances and didn't want to put the list on the side of the fridge, in hopes that my hubby will mark something when we need it, I used one of these command hooks!

Voila, there you have a custom shopping list! I decided to add the little brad that I had here to spice it up a little more.
(Please excuse the smudges on the fridge! I could clean this thing daily, and it would still have smudges everywhere from some little monster in this house!)

Monday, February 21, 2011

Pop-up Card

I found this really awesome card idea here and knew I had to make a card like this! I decided I would make one with hearts for A on V-day! It has a link that you can use the Cricut with SCAL to cut all the lines, but I couldn't figure it out, so I broke out the x-acto knife and got to cutting. I did print all the lines on the cardstock I was using. It only took me 2 hours to complete the whole thing, great use of nap time, right? I love the way it turned out though! I cut the hearts at .75" each, there are 16 total. I used papers from the 1 Spot at Target.

Then I had to decide what to do to the front of the card, it had to be equally impressive! Birds seem to be super popular right now, so the idea of doing 2 love birds in a tree with heart leaves came to mind. This is what I came up with!

Saturday, February 19, 2011

Candle Holder Make Over

I went to Hobby Lobby yesterday, my favorite store in the world! I always browse the clearance aisle since you can find some great items that normally have nothing wrong with them. I found some drawer pulls that have made me want to remodel out downstairs bathroom, now just to talk the hubby into it! I also found a candle holder that I thought had great potential. It didn't have anything wrong with it, just wasn't my style.This is what I started out with.
I had intentions of taking the decorative pieces off the sides and then putting them back on, but apparently they weren't meant to be put back on.
Then I gathered all of my supplies:
Modge Podge.
I thought I would use spray adhesive, but then changed my mind.
Natural twine or other type of ribbon.
X-Acto knife.
2 pieces of 12x12 scrapbook paper.
Foam Brush.
Dark Walnut Stain.
I started out by slapping some Modge Podge on one side of the holder. I didn't start the paper on the corner, but about an inch from the corner. Continue to work around the holder. It will come to look like this.
Cut your second piece of paper to 8x12. I folded the sides in so that it would look a little cleaner, but you don't have to do this. When done wrapping the paper around, cut slits at the corners so that you can fold them down. I folded 2 pieces down, and then on the other 2 pieces folded them in to make an angle so that it would be a cleaner look. Like this:
You might need an extra hand in there :)

Now do the same with the top and cut out the opening as you go.

You will end up with something that looks like this. Put 2 to 3 coats of Modge Podge to seal it all.
I thought it was missing something and didn't look quite like I had hoped for it to. I went and got my stain, yes the same stain I used for the paint chip canvas. I rubbed it on with a some paper towels until I got the look I wanted. Then I added my twine, put some black beans (yes you read that right!) in the candle holder part, and added a tea light. I LOVE the way it looks now.
Total cost: $2.49!

You are probably thinking that you will not find something like this at your store, but you never know! I also got to thinking that you could use a 4x4 post and cut it different lengths to make a grouping, which I am already planning to do! I will enlist my husband to drill some holes in the top for the candle holders! You could also use this to plant a small plant in! I was going to try this out but was too lazy to hike out to the shed in the snow to try and find a pot and potting soil.

Thursday, February 17, 2011

Paint Chip Canvas

I have seen a few tutorials recently on creating a piece of artwork out of paint chips from the hardware store and knew I wanted to make one! I finally remembered to pick up the paint chips and was headed to get a piece of wood to use and then remembered that I bought some small canvas pictures from dollar tree a while back to make who knows what!

First you will need to gather your supplies:
Tacky Spray
Modge Podge-Mat-Matte
Paint color of choice, I used a shade of green
4 Canvases from Dollar Tree
Paint chips
Cheap foam brushes
Stain--I used Dark Walnut
I paper trimmer or ruler and scissors
X-acto knife or other sharp knife

If your paint chips are not square, like mine, trim them all to make them square.
Paint the edges of your canvases so that they are all the same color. They don't have to be perfect. I did 2 coats of paint.
Now, lay all of your paint chips out so that you get them in the order that you want, make sure your canvases are all butted up to each other. I then stacked them in layers so that I knew what went where and worked with one row at a time. Spray some spray adhesive on both the canvases and the paint chips. Since my paint chips did not go all the way to the edge, I made sure to leave the equal amounts of space on all sides.
Grab a helper :)
Use your X-Acto knife to cut the canvases apart now. I learned that it is best to lay all of the paint chips down and then cut once complete instead of cutting as I went.

Slap on some Modge Podge! You can't mess up. I put 3 coats on letting each coat dry completely.

Once the Modge Podge is nice and dry, get out the stain. Make sure you get it in the cracks really good, and don't forget the edges that you painted. Wipe it off and apply again. I only did 2 coats and got the look I was going for.
Let it dry overnight and hang on your wall of choice! I could not get a good picture for the life of me. I think I took 50 and this was the best I got, lighting sucks in bathrooms. I chose to hang it in our downstairs bathroom. I love the way it turned out and already have another idea for one to hang in a childs bedroom!
The final cost for me was $0 since I had everything on hand, but if you don't it will be under $10 and you will have some of the supplies on hand for another project!

Wednesday, February 16, 2011

Can you make me some cupcakes?

A: Will you make me some cupcakes to take to M at work?
Me: Sure. When do you need them and what flavor?
A: Thursday, and I don't care.

Don't you love the "I don't care" part? Maybe this isn't a big deal to the "normal" person, but for me there are far too many choices out there and it takes me days to figure out what to make. At first I was going to go with a smaller version of this gorgeous Neapolitan cake but then I decided that the pink frosting wasn't very boyish. See why it takes me so long? Then I started wondering if there are any allergies or if he liked chocolate, strawberry, vanilla, and so on. I finally decided to go with these Hi-Hat cupcakes by none other than Martha herself! I used my go-to chocolate cake recipe, the Hershey's Celebration cake, and followed Martha the rest of the way. They are surprisingly easy to make, other than having to stand over the stove with a hand mixer for 12 minutes. :o

I also decided I would use my Cricut to make some cute cupcake wrappers, can't neglect her. :) I found these a long time ago. I had to resize them to make them fit and they are still taller than I would like, but that is as small as I could get them and make them fit around the cupcake.

Then I added some tulle to the cupcake holder and a gift tag stamped with Happy Birthday.

I hope this works for "I don't care!"


Wednesday, February 9, 2011

Mickey Mouse Birthday Party

My little guy turned 2 yesterday. It is so hard to believe that 2 years have gone by so quickly! On Sunday, I threw him a Mickey Mouse party and he LOVED it! He is totally obsessed with "mouse!" Here is a sneak peak at all of the tutorials that are to come.
The first thing you need for a party is to create an invitation. I have seen so many ideas floating around, but fell in love with this one.
I created this invitation right after I got my cricut and SCAL, so I was still trying to figure out what I was doing! I found a free Mickey head svg and went from there. The card measured 5.5" tall and 6.5" wide. Then I used the draw tool in SCAL to trace around the bottom portion to create the read "pants." I added real buttons, but you could use ones cut out with the cricut. For the party information in the pocket, I found a Mickey graphic that I liked and then went to Photoshop! It measures 3 x 7.5. I saved it as a jpeg and then opened it up in OpenOffice. There I made 3 fit on a sheet and printed it on white cardstock. Finally, fold it in thirds and place in the pocket! I made custom envelopes for all of them, which did require extra postage.

If you are looking for any of these products to buy, you can find them in my etsy store at: inspiredbyjagger.etsy.com.

Monday, February 7, 2011

Whoooo loves you?

Owls are all the rage these days, so I knew I wanted to make an owl valentine's card! I came up with the idea of making the card one big owl! I ran across this owl svg a while ago and loved it, so that is what I used. I made it to fit in a 5 x 7 envelope, so play around with your measurements, and remember to check the "Keep Proportions" box. I then welded them together on the side, but you could potentially make it open from the top. I used a silver paper for the main card and the all of the valentine paper is from Target 1 spot, again!


For the right inside of the card I cut out "Whooo heart's you?" in pink glitter paper and added a stamp from Michael's. For the left side I added a piece of Jagger's art work and I added some bling to it with some clear glitter glue. I always like to add the name of the child and year so that I can remember when this was done years from now.

Later this week I will be showing you how to turn shipping boxes into lined storage containers, some birthday cards, and the beginning of the projects from Jagger's Mickey Mouse party!

Friday, February 4, 2011

LOVE

Here is my second valentine card that I added Jagger's art to.

Again, I used SCAL and my cricut with a free svg! I got the svg from here. I took the bottom layer and and welded 2 of them together to make the card. I can't remember the exact size that I cut it at, but it was around 3 x 8. Just click the Keep Proportions button and play around with it until you get it the size that you want. I cut this out on, you guessed it, white shimmer paper! You have to play around with it to make it line up right. I added a picture of Jagger in the "O" and ribbon to the bottom. For the "L,V,E" make sure you resize them as well. All of the paper came from the 1 spot at Target, again.

For the inside I cut out another inside "L, O, V, & E" and also used Jagger's art cut out in the shape of a heart.

I did have to cut out a envelope for this one since it is not a standard size. Here is where I bought some envelope templates to use when needed.

Wednesday, February 2, 2011

Paper Flowers

I will be sharing more of my cards that incorporate your child's artwork, but I wanted to share this card with you tonight! I loved how it turned out and I am even more in love with paper flowers now! They are simple to make but add a real punch to any card.

I used a baby pink card that I already had to start. Then I cut 5 different valentine papers that I got from the $1 spot at Target, which you should check out if you haven't already, and cut them 1" wide by about 6" long. Lined them up on my cricut mat in the order I wanted them. I used a frame that I already had in my SCAL library to cut them. For the paper flower, I used a flower that is in my SCAL library and cut 4 different sizes each a 1/4" different. The largest was 2". I then curled the edges and added the black brad in the middle. For the banner, I used white simmer paper and added the stamp, from Michael's.


For the inside, I just added some matching paper, topped with some shimmer paper, and inked the edges.

Tuesday, February 1, 2011

Incorporating Artwork

Ever wonder how you can incorporate your child's artwork into a gift for a family member? I have done several different projects with Jagger and given my mom from paintings that Jagger has done. Jagger has really been into painting lately, so we made some valentines "art" and I knew I was going to be sending out handmade valentine cards to some family members, so I decided to incorporate this art in the cards. I have 3 different cards that I have done so far. First up, a tree of hearts.
I used brown craft cardstock, dark red damask paper, and dark red cardstock. My card is 5 x 4. For the brown tree I used a shimmer paper, which I am loving! Then, you guessed it, I used the painting for the hearts! I have a cricut but use SCAL for all of my cuts. I always search for free svg files before even thinking about buying any! Here is where I got the tree of hearts file. The stamp is from a set I got at Target. I added a little bling to the one heart.

Enjoy and I can't wait to share all of the other projects I have been working on!