I have seen a few tutorials recently on creating a piece of artwork out of paint chips from the hardware store and knew I wanted to make one! I finally remembered to pick up the paint chips and was headed to get a piece of wood to use and then remembered that I bought some small canvas pictures from dollar tree a while back to make who knows what!
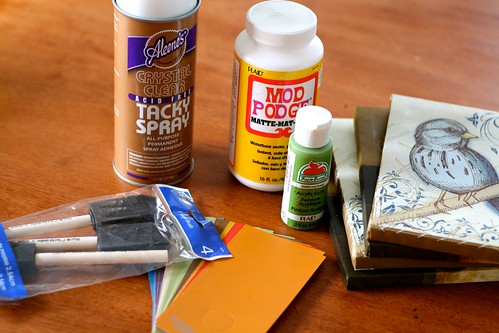
First you will need to gather your supplies:
Tacky Spray
Modge Podge-Mat-Matte
Paint color of choice, I used a shade of green
4 Canvases from Dollar Tree
Paint chips
Cheap foam brushes
Stain--I used Dark Walnut
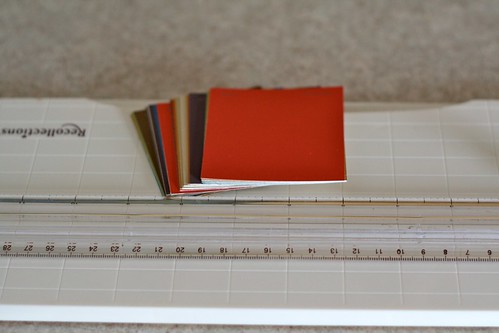
I paper trimmer or ruler and scissors
X-acto knife or other sharp knife
If your paint chips are not square, like mine, trim them all to make them square.
Paint the edges of your canvases so that they are all the same color. They don't have to be perfect. I did 2 coats of paint.
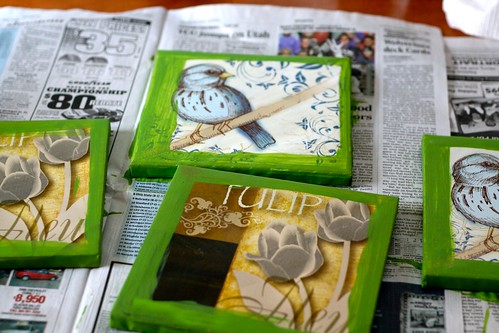
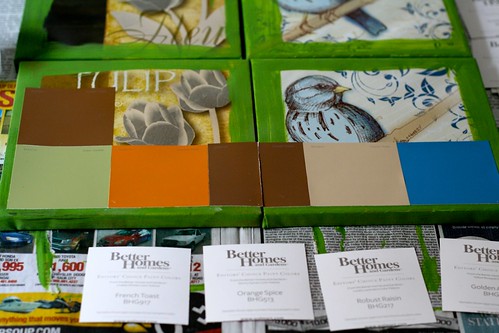
Now, lay all of your paint chips out so that you get them in the order that you want, make sure your canvases are all butted up to each other. I then stacked them in layers so that I knew what went where and worked with one row at a time. Spray some spray adhesive on both the canvases and the paint chips. Since my paint chips did not go all the way to the edge, I made sure to leave the equal amounts of space on all sides.
Grab a helper :)

Use your X-Acto knife to cut the canvases apart now. I learned that it is best to lay all of the paint chips down and then cut once complete instead of cutting as I went.

Slap on some Modge Podge! You can't mess up. I put 3 coats on letting each coat dry completely.

Once the Modge Podge is nice and dry, get out the stain. Make sure you get it in the cracks really good, and don't forget the edges that you painted. Wipe it off and apply again. I only did 2 coats and got the look I was going for.

Let it dry overnight and hang on your wall of choice! I could not get a good picture for the life of me. I think I took 50 and this was the best I got, lighting sucks in bathrooms. I chose to hang it in our downstairs bathroom. I love the way it turned out and already have another idea for one to hang in a childs bedroom!

The final cost for me was $0 since I had everything on hand, but if you don't it will be under $10 and you will have some of the supplies on hand for another project!
1 comment:
Oh this is SO creative! I am going to try this SOON!!
Post a Comment